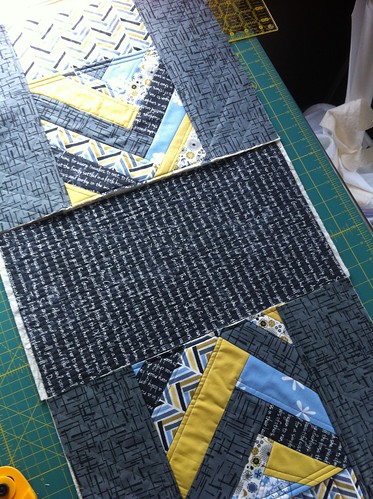
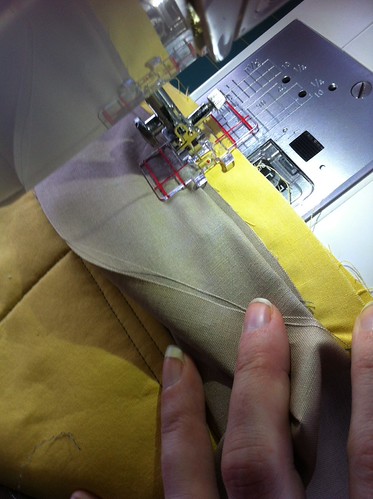
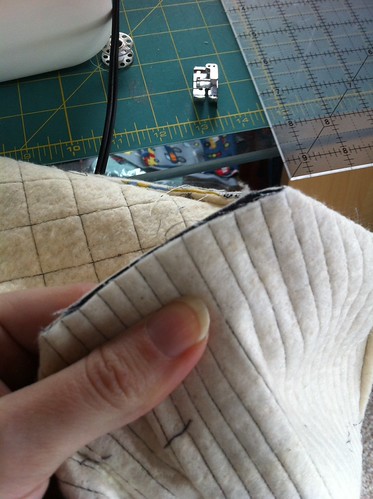
Простегайте панели с интервалом шва на 1/2 "
Затем повторите со всеми панелями 4 C, обрезкой до 5 × 13 "и с панелью D, обрезкой до 17 × 9". Отложите.

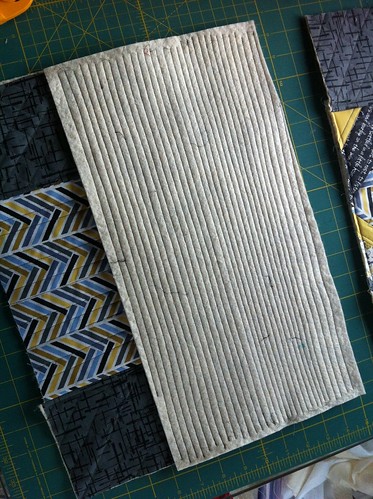
2) Сделайте внешние карманы - B. Сделайте 2.
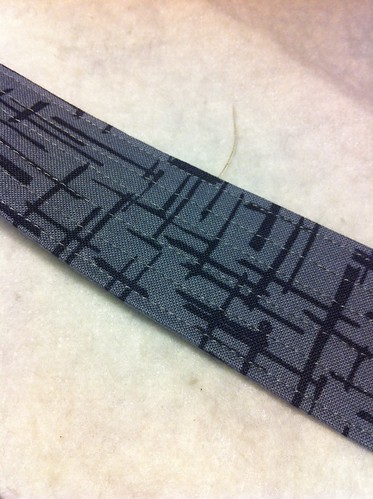
Так как я использовал серографический отпечаток для своих панелей A, я решил одеться в карманы (B), используя дизайн елочки свободной формы. Вы можете использовать любой дизайн, который вам нравится, но приведенные ниже инструкции предназначены для елочки и должны дать вам представление о том, как одеваться, как вы идете, чтобы сделать другой узор.
Возьмите один ватин B и положите на рабочую поверхность. Захватите или разрежьте лоскут в форме треугольника и проложите верхний край ватин RS вверх. Положите полоску другой ткани вдоль нижнего края треугольника WS вверх. Пришивать с помощью 1/4 "шва. Отверните полоску от треугольника

Вдоль другого нижнего края треугольника и полосы, которые вы только что сшили, заложите еще одну полоску вниз (WS up), чтобы она пересекала шов. Пристрочите. Отверните от треугольника.

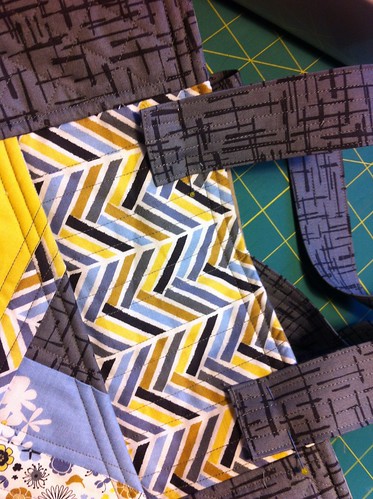
Повторите этот процесс, сшивая полоски на чередующихся сторонах, до тех пор, пока ватин не будет закрыт. Обрезать до 9 × 9 ".

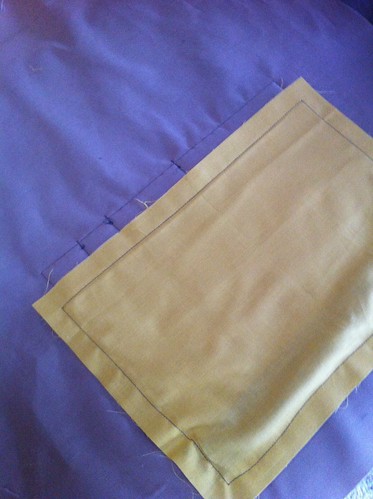
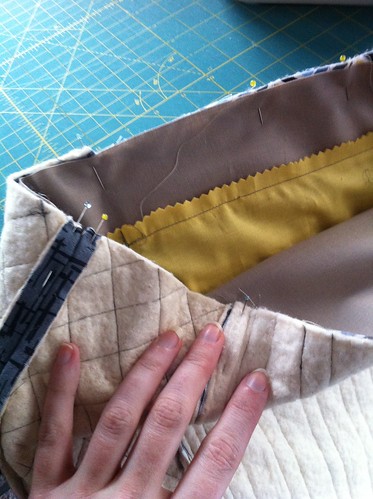
Положите прокладку ткани B поверх стеганого B, RST и прошейте шов 1/2 "сверху. Надавите и переверните ткань так, чтобы RS обоих наружу. и нажмите вдоль шва. Topstitch 1/4 "от верхнего края; topstitch 1/4 "ниже этого.


3) Сделайте центральную карманную панель AB. Сделайте 2.
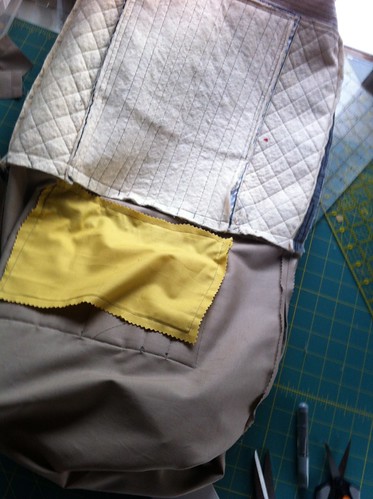
Поместите один Ext. Карманный B поверх одного центра Pocket A, RS вверх, выравнивая нижний и боковой края. Сшейте 1/4 "шов вдоль краев, где карман и центр, чтобы обеспечить безопасность.

4) Прикрепите боковые панели C. Сделайте 2 боковых панели (C + AB + C).
Здесь швы могут стать немного громоздкими. Идите медленно по самым толстым частям.

Поместите одну боковую панель C в одну центральную панель AB, 13-дюймовые стороны RST и прошейте с помощью шва 1/2 ". Надавите шов на боковую панель C. Верните строчку на 1/4 "от шва на боковой панели, зацепив и закрепив 1/2" шовное пособие снизу для структурной поддержки. Повторите на другой стороне.

5) Прикрепите нижнюю панель D.
Теперь, когда у вас есть две боковые панели, пришло время прикрепить их к нижней части. Напомните себе, что карманы наиболее функциональны, когда отверстие находится наверху, и это поможет вам вспомнить, где разместить нижнюю панель.


Lay the bottom panel RS down along the bottom edge of one Side Panel unit (ABC). Sew using a 1/2″ seam. Press seam allowance towards bag bottom. Topstitch 1/4″ from seam on bottom panel, catching the 1/2″ seam allowance underneath as with side panels in Step 4.

Place other edge of Bottom Panel D RST down along bottom edge of other Side Panel unit (remember pocket opening up!). Attach with 1/2″ seam. Press and topstitch as above.
Woohoo! Your exterior panel is ready to be set aside for a bit. Grab a chilled beverage or a cup of tea. Smile. Enjoy!
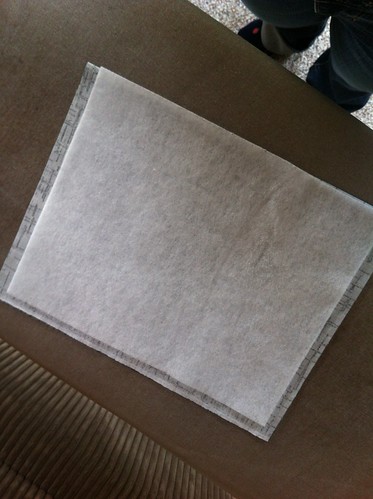
6) Prepare Divided Pocket F.
Fold fabric in half RST so that it measures 11×5″. Press. Check you’ve got it the right way or your fusible fleece/interfacing won’t fit properly and you’ll end up with goop on your iron.
Lay fusible fleece adhesive side towards WS of fabric so that long edge of fleece is along folded edge of pocket and there is a 1/2″ of fabric extending along the other 3 sides. Press and fuse according to the manufacturer’s directions. (This might mean you have to flip it so your fleece is on the bottom – just take care not to shift it out-of-place when flipping. )
Sew along edge of fleece using 1/2″ seam allowance, and leaving a 4″ gap at bottom of pocket for turning, backstitching at each end. Trim corners, taking care not to clip into stitching.

Flip pocket RS out. Press. Topstitch 1/4″ from top (folded) edge, backstitching at ends; topstitch 1/4″ from that, backstitching at ends.
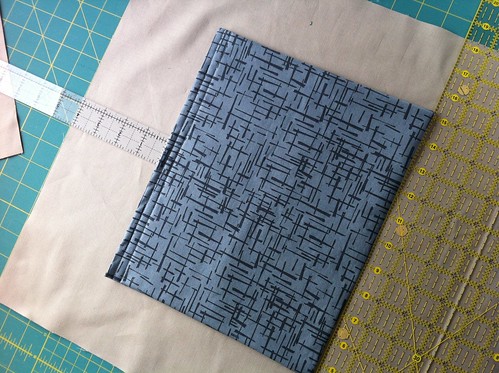
Using a marking tool, mark dividing lines from top to bottom at 1.25″, 2.25″, and 4.75″ from left hand side (or as desired.)

7) Prepare Large Interior Pocket G.
Prepare Large Pocket G in same manner as Divided Pocket F, with folded RST piece measuring 11×9″. Fuse, sew, trim, flip, press and topstitch as in Step 6 but don’t mark any dividing lines. (Unless you want divisions in this pocket. But it’s kinda deep for those…)


8) Attaching Divided Pocket F to Interior E.
Grab your interior pocket. Remembering once again that pockets work best when they open up, it’s good to keep in mind that the short edges of the Interior Lining (E) will both end up at the top. It’s a good idea to bring the top edges together and press the fold at the centres of the long sides (16.5″ sides x 17″ top) and consider the fold as the “bottom”.

Centre your prepared Divided Pocket F on Interior E about 4.5″ from the top edge. Pin in place and edge-stitch to attach pocket to Interior, backstitching at each end.

To divide the pocket, topstitch along marked lines, starting at bottom edge of pocket and working towards top edge, backstitching at both ends.
8) Attaching Large Pocket G to Interior E.
Centre prepared Large Pocket G on Interior E about 4″ from other top edge. Attach in same manner as Divided Pocket in Step 7, ignoring division instructions.

9) Prepare Zip Pocket H.
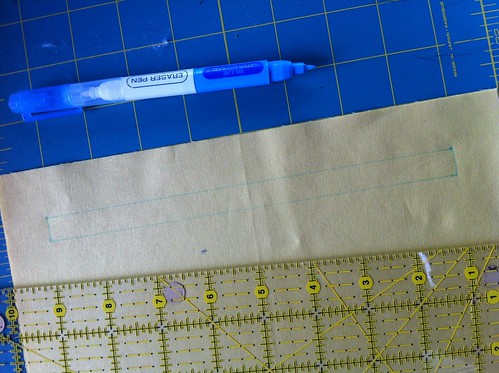
The fabric pieces are 10″wide and 7″ high. This will help you understand the orientation.

On wrong side of one piece, draw a box using your marking tool, that is 1/2″ high and about 8″ long, with the top of the box 1″ down from top of fabric piece. (If you think that this won’t leave you enough seam allowance to attach other side of pocket, make it 1.5″ down and 7.5″ long.)
10) Attach Zip Pocket H to Interior E.

Using the same end of interior that has the Divided Pocket F attached, centre your marked Zip Pocket H piece on Interior E, RST, so that top of the box you’ve drawn is about 2.5″ down from top edge of the Interior. (And just over an inch above your Divided Pocket.) Pin in place
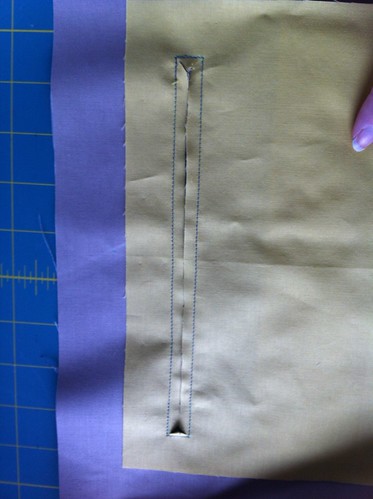
Sew along the lines of the box you’ve drawn to attach the pocket to the interior, backstitching at start and stop.
Cut a line into the middle of the box (only inside that box) and clip into corners, taking care not to cut your stitches! Your cut will look a little like this: >———<

Gather up the zip pocket and push it through that hole you’ve just made so that the right side is facing out on the back. Press.

11) Attaching zipper.
I’m hoping you’ve done a zipper before because explaining zippers is not my strong suit. I have done several but I’m still a rookie, and let me tell ya, folks, this one kicked my butt! It didn’t turn out perfect, and zip experts will probably say I did it all wrong but it works, and that’s what I cared about.

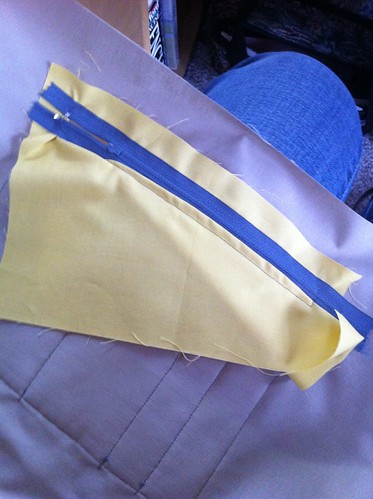
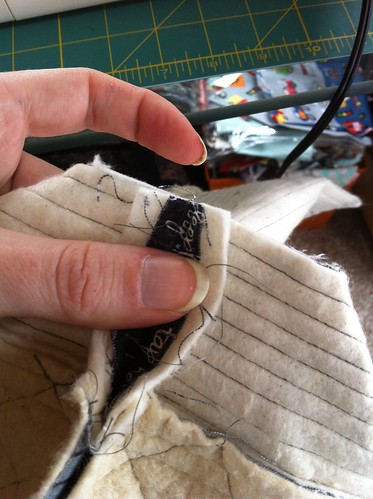
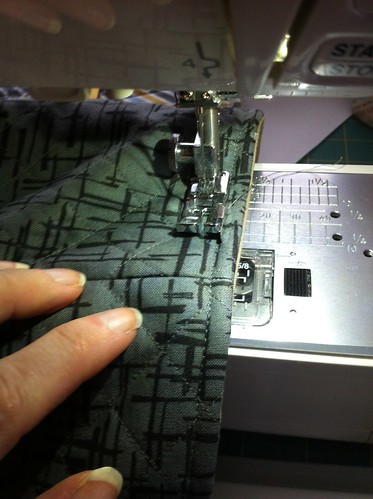
Pin your zipper into the opening you’ve made. You can change to a zipper foot, if you like, but you basically just want to stitch all the way around it so that you’re securing the zipper tape to the bag interior, backstitching at stop and start to secure. Take care when sewing over the zipper teeth!
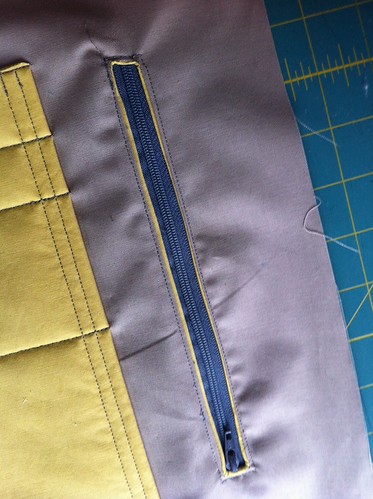
Also, take care that your interior and Zip Pocket lining are pulled clear from the zipper or you’ll accidentally sew it to the zipper and you’ll need your seam ripper. I did. It looked like this:

What’s really embarrassing is that I did it twice. If you find you did it once, it’s time to take a break, so that you don’t do it twice.
12) Finishing Zip Pocket H.
Take remaining Zip Pocket fabric piece and place it RST with the piece you’ve just added the zipper to. Pin together.
If you have a long zipper, it might extend past the edges of the pocket. That’s fine and, in fact, preferable, provided that you don’t end up sewing over the metal stop at the end of the teeth. Metal stop=broken needles/possible injury!
Again, taking extreme caution that your bag Interior is clear of the needle, sew a 1/2″ seam allowance around the edges of the Zip Pocket, backstitching at start and stop.

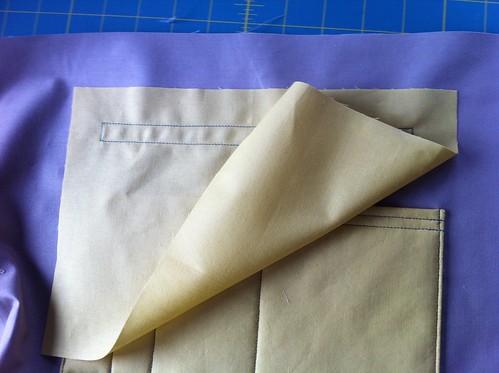
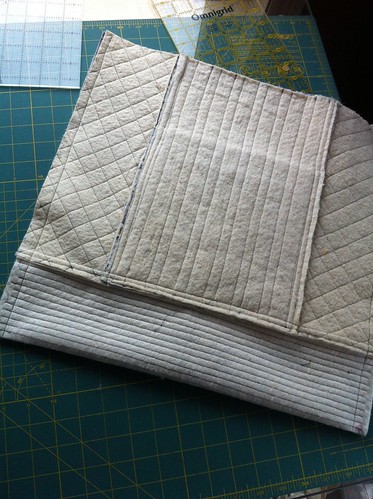
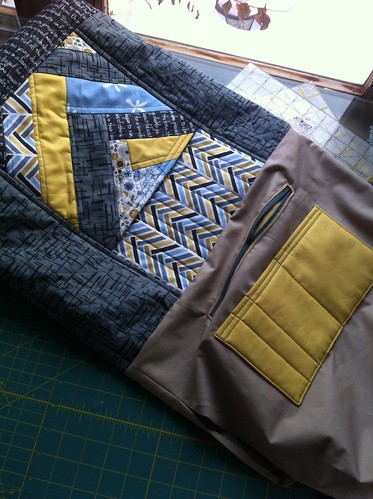
Woohoo! You should have two assembled pieces that look like this:

Time to do a little dance/stretch and refresh your beverage!
13) Side seams.
Fold Exterior Panel RST so that top edges meet and sides are aligned. Sew down side using 1/2″ seam, backstitching at top edge.

Repeat with Interior, but leave a 6-8″ turning gap on one side, making sure to backstitch at top and either side of gap.
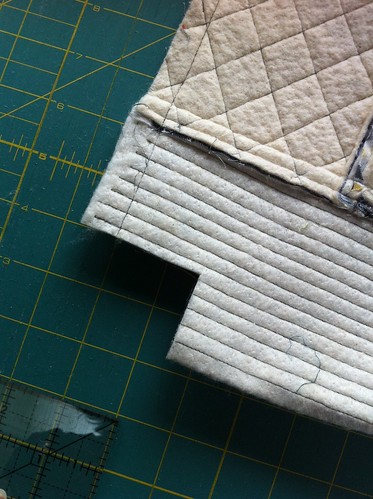
14) Box bag corners.
Using a ruler, mark a 1.5″ square from the bottom and side seam stitching. (Don’t measure from the side edge or it will go all wonky on you. Measure from your stitching!) Cut this square away.


Pinch the bottom and side together so that the side seam meets the bottom edge, taking care to math the cut edges. It should look like this:

Sew 1/2″ from the cut edges, backstitching at each end. Repeat on other side for both interior and exterior. Press side seams open.
14) Attach Exterior to Interior.

Flip your Interior so that RS are facing out. Slip it inside Exterior, RST, and pin along top edges, matching side seams. Sew along top using 1/2″ seam, backstitching at both ends.

Using the turning gap you made in the interior side seam, turn your bag right side out. If using cardboard to give a flatter bottom to your bag, insert it through the turning gap now.

Close your turning gap. You can hand-stitch it closed with a blind stitch or ladder stitch. OR you can be a little lazier like me and pinch the seam together and edge-stitch it closed by machine.
Push your interior inside the exterior, putting corners into corners, etc. Press around top edge. Topstitch 1/4″ from top edge, backstitching at each end; topstitch 1/4″ from that.

15) Make Straps I. Make 2.
With WS facing up, fold fabric 1/2″ in on each 6″ edge. Press.
Fold fabric in half WST lengthwise. Press. Open back up.
Fold long edges of fabric in towards centre crease, WST. Press.

Fold in half again. Press. There should be no raw edges of fabric showing. Edge-stitch around strap to secure, backstitching at start and stop. Add topstitching lines about 1/4″ apart all down length of strap, backstitching at each end.
16) Attach Straps to bag.
This can be a little awkward to manoeuvre but if you feel comfortable, clever use of the reverse function can make it easier.

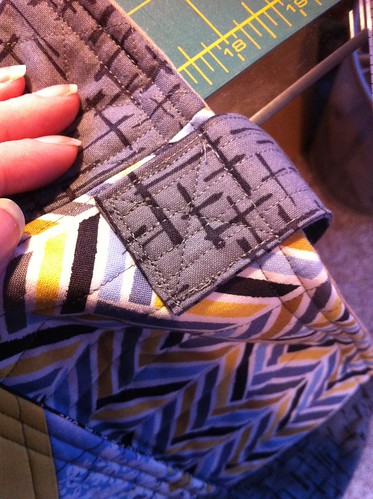
Aligning straps with the seam that attached Centre Panel AB to Side Panel C, pin in place approximately 1.75″ from top edge. Sew to bag by edge-stitching around outer edges and crossing the strap at the first topstitching mark. Then sew an X from corner to corner. Repeat with other end of strap at other side seam, taking care not to twist the strap before securing.

Oops! I should have trimmed a few threads before snapping this one…
Attach other strap.
And CELEBRATE! Admire your handiwork!
I hoped you enjoyed this tutorial – and trust me, it took way longer to write than to make the bag.
Источник